Step-by-Step Basement Renovation Process Explained

A basement renovation is a major upgrade—and like any major project, it’s only as strong as the process behind it. Knowing each step ahead of time can help you avoid costly surprises, reduce delays, and make better design choices.
Whether you’re building a home gym, income suite, or entertainment space, a clear plan keeps everything on track. This guide breaks down the full basement renovation process so you know exactly what to expect from start to finish.
Want expert support from day one? Explore our basement renovation services and see how we guide you through each step.
Step 1: Planning and Discovery Phase
Every successful basement renovation starts with a clear purpose. Before anyone picks up a tool, you’ll need to define the “why” behind the project.
Ask yourself:
- What will this space be used for?
- Will it serve multiple functions?
- Are you creating a legal rental suite or just upgrading for comfort?
This is also the time to start budgeting. Homeowners often underestimate how quickly costs can rise once construction begins. Understanding your must-haves vs. nice-to-haves ensures your investment goes where it counts most.
If you’re still gathering inspiration, check out our list of basement renovation ideas that boost home value. And to get a clear sense of what a project like yours might cost, visit our full guide on how much a basement renovation costs.
Step 2: Site Assessment and Initial Walkthrough
Once your goals and budget are clear, the next step is to bring in a professional for a site assessment. This is where a contractor or designer evaluates the condition and potential of your basement.
What they’ll assess:
- Ceiling height and headroom clearance
- Structural integrity and moisture presence
- Access to plumbing and electrical
- Layout feasibility (can you add a bathroom? Separate entrance?)
They’ll also flag any limitations—like if your ceiling height is too low for a legal bedroom, or if waterproofing is needed before construction can begin.
Still deciding how far to go? Understanding the difference between a finished vs. unfinished basement can help you make smarter design and budget decisions.
Step 3: Design and Layout Planning
With your goals defined and your space assessed, it’s time to design your ideal basement. This is where vision turns into a floor plan.
A designer or contractor will help you:
- Create a functional layout based on your needs
- Choose materials, finishes, and fixtures
- Plan for lighting, heating, cooling, and soundproofing
- Optimize the space for future flexibility (guest suite today, rental suite tomorrow)
Zoning is key here. Define spaces clearly: office vs. lounge, storage vs. gym. The more thought you put into flow and function now, the smoother the renovation will go.
Step 4: Permits and Approvals
This is the step many homeowners overlook—but it’s critical. Depending on what you’re building, you’ll likely need municipal permits for structural changes, electrical, plumbing, and HVAC work.
If you’re adding a rental suite, the requirements increase:
- Egress windows
- Separate heating controls
- Fire-rated construction
- Plumbing and venting approvals
Your contractor should handle all permit applications on your behalf. That’s why it’s so important to hire the right basement renovation contractor—one who knows the local code, timelines, and process inside and out.
Learn more about what these permits cost and how they affect your timeline in our basement renovation cost guide.
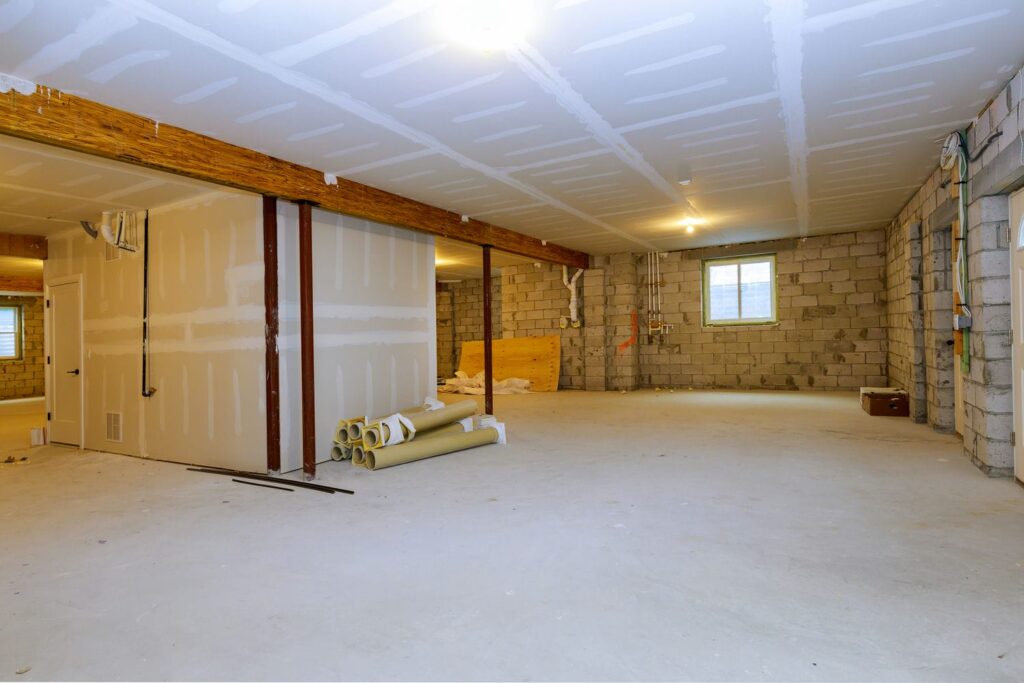
Step 5: Demolition and Site Preparation
Once permits are approved, the real action begins. First, the old space needs to be stripped down so new work can begin.
This phase includes:
- Removing old flooring, drywall, and framing
- Identifying and addressing any mold, water damage, or foundation issues
- Waterproofing the basement if needed
- Leveling the floors and adjusting ceiling framing if necessary
- Relocating or upgrading mechanical systems if they’re in the way
This is also the best time to fix any lingering moisture or drainage problems. Skipping this step can undo all your hard work down the line.
Step 6: Rough-Ins and Framing
Now that the space is prepped, it’s time to bring it to life—starting with the “behind-the-walls” work.
What happens here:
- Electrical wiring and outlet placement
- Plumbing lines for bathrooms, wet bars, or laundry
- Ductwork and HVAC upgrades
- Insulation for comfort and energy efficiency
- Framing out rooms, closets, hallways, and storage
This is a critical step where layout planning meets physical construction. If you’re installing a basement suite, fire-rated materials and soundproofing may be required at this stage.
Step 7: Drywall, Flooring, and Interior Finishes
With the bones in place, your basement starts to feel like part of your home. This is where you begin seeing your vision come together.
This phase includes:
- Hanging and finishing drywall
- Painting walls and ceilings
- Installing flooring: laminate, vinyl, tile, or carpet
- Adding baseboards, trim, doors, and casing
Now’s the time to choose finishes that complement your upstairs design. A well-finished basement doesn’t just add space—it adds cohesion.
Step 8: Final Touches and Inspections
Once all finishing work is complete, your contractor handles the final details and city inspections.
What to expect:
- Fixture installation (lighting, faucets, cabinetry)
- Final electrical and plumbing inspections
- Touch-ups, cleanup, and project walkthrough
- Identification of any deficiencies (the “punch list”)
Everything is reviewed to ensure it meets code—and your expectations.
Want to understand how long each phase typically takes? See our guide on how long a basement renovation takes.
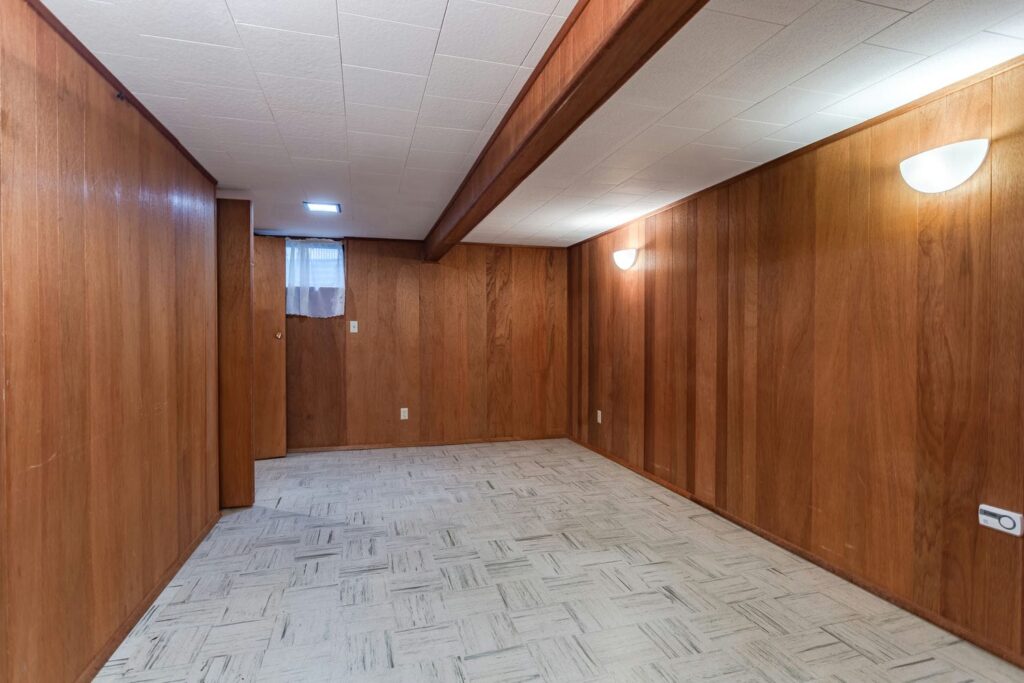
Step 9: Clean-Up and Final Reveal
With inspections complete, the site is cleaned and prepared for occupancy. You’ll get a final walkthrough, review the work, and get any remaining questions answered.
This is also when before-and-after photos really shine—your dark, empty basement is now a bright, usable extension of your home.
Curious what your own transformation could look like? Start with our Ultimate Guide to Basement Renovation.
Step 10: Maintaining Your New Basement
Your new space is finished—but upkeep matters. Stay ahead of future issues by following a few simple maintenance steps:
- Use a dehumidifier in summer months
- Inspect window wells and exterior drainage
- Check for signs of leaks after major storms
- Clean vents and fans regularly
Routine maintenance keeps your basement dry, comfortable, and valuable for years to come.
Final Thoughts
The basement renovation process may seem overwhelming—but when done right, it’s incredibly rewarding. From smart design and planning to flawless execution, every step matters. And with the right team by your side, it’s easier than you think.
Whether you’re building a basement suite, home office, or gym—we’ve done it all. Ready to Get Started? Let’s bring your vision to life—step by step, with no surprises. Request a basement renovation quote today.
Check out more posts below...

In-Law Suite Vs. Legal Rental In Newmarket: Which Fits?

Why Older Newmarket Basements Often Need Underpinning

What Newmarket Requires To Register A Basement Suite

Basement HVAC Basics: Return Air, Zoning, And Year-Round Comfort