What To Expect At Inspections During A Basement Renovation

Basement renovation inspections are predictable when your scope and sequencing are tight. You usually get inspected at the “you can’t hide this later” milestones, like framing and rough-ins, insulation and vapour barrier, and then final. If you call too early, you fail and rebook. If you cover work too soon, you may have to open it back up.
Yorkland’s basement renovation services cover the full scope, from permit sequencing through final inspection, which is how projects pass without rework.
In most GTA basement renovations, you can expect some combination of these inspection stages (your municipality and scope decide the exact list):
- Framing and rough-ins (before drywall)
- Plumbing rough-in (if you add a bathroom, laundry, or bar sink)
- Insulation and vapour barrier
- Life-safety details (fire separation and exits, when triggered by scope)
- Final inspection
What A Basement Renovation Inspection Really Is
A basement inspection is not a “nice-to-have.” It’s a checkpoint where the municipality verifies that the work matches the approved plans and basic safety rules before it gets covered. Treat it like a gate in your build schedule, not an interruption.
You’ll have an easier experience if you plan for inspections the same way you plan for trades. That means clear stages, clean access, and no surprises hidden behind drywall.
Quick Definition
A mandatory inspection is a required site visit where an inspector checks code compliance at a specific stage, before the work becomes hidden. If the stage isn’t ready, the inspection can’t pass.
This is why inspections show up in “boring” moments like vapour barrier and framing. Those details matter, and they are impossible to verify once you close the walls.
Here’s The Catch
Inspectors can only approve what they can see. If a key element is covered before the mandatory inspection, you’re often forced to uncover it to prove compliance.
The City of Toronto’s building inspections guidance is blunt about this: inspectors must be able to see the work under inspection, and covered elements may need to be uncovered to be inspected and passed.
Who Inspects What In The GTA

Different projects trigger different inspectors and sign-offs. Your job is not to memorize every rule. Your job is to make sure someone owns the process, knows what’s required, and books the right inspection at the right time.
A good contractor treats inspections as part of the scope. A risky contractor treats inspections as an afterthought.
The Building Department’s Role
Your municipal building department inspector typically checks the work that falls under the building permit and the approved drawings. In a basement, that often includes framing layout, insulation and vapour barrier, and life-safety items that apply to your design.
They are not there to grade your finish carpentry. They’re there to confirm the “bones” of the build are safe and match what was approved.
Trade Inspections Can Be Separate
In many Ontario projects, some trade work may have separate inspection requirements outside the municipal building visit. This can include trade-specific inspections, documentation, or sign-offs depending on what you’re changing.
The practical takeaway is simple: ask your contractor who is responsible for each call, and what must be approved before drywall. If nobody can answer clearly, you’re the one holding the risk.
Paperwork That Needs To Match The Work
Inspections go smoother when your paperwork and the site match. If you change the layout mid-build, you can trigger corrections, delays, or requests for clarification.
The City of Toronto’s building inspections page notes that permit drawings and permit-issued information must be available on site upon request, which is a practical standard to follow across the GTA regardless of municipality.
The Inspection Stages You’ll Typically Hit In A Basement Renovation
Think of inspections as a sequence. Each stage is designed to catch issues before they become expensive to fix. If you try to skip the sequence, you usually pay for it in rework.
The exact inspection list depends on scope and municipality. However, the stages below are the ones that most often show up in finished basement projects.
Pre-Work Or Early Checkpoints (When Scope Changes Trigger Them)
Some basement renovations need early review because the scope changes what the municipality needs to see. Bedrooms, plumbing additions, structural changes, and suite-like layouts can all shift the inspection path.
Before committing to a design, it is worth confirming when a basement reno needs a permit, since scope determines which inspections apply.
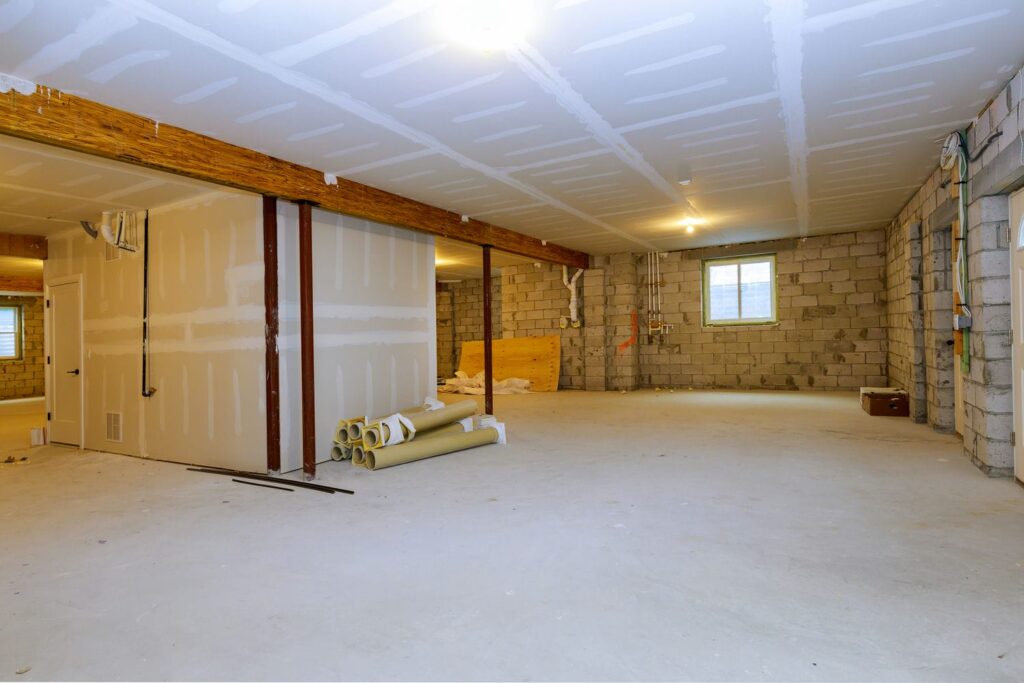
Framing And Rough-In Inspection
This is the inspection that protects you from hidden mistakes. At this stage, framing is up, and key rough-ins are visible, but nothing is covered.
What inspectors usually want is clarity. Clear framing, clear routes for ducts and plumbing, and no “mystery bulkheads” hiding problems. If you plan to change anything structural or squeeze mechanical runs into tight spaces, this stage is where you want those decisions reviewed.
Plumbing Rough-Ins (If You Add A Bathroom, Laundry, Or Bar Sink)
If you add plumbing, you add complexity. Plumbing rough-ins often require the work to be visible and ready for inspection before it’s boxed in.
The biggest homeowner mistake is letting the project drift into drywall before the plumbing stage is signed off. Once ceilings and bulkheads are closed, a plumbing correction can turn into a demolition job.
HVAC And Mechanical Changes (If You Touch Ducts Or Equipment)
If you modify ductwork, add new runs, or enclose mechanical areas, you can trigger extra scrutiny. Basements are tight. Mechanical systems need access, safe clearances, and practical servicing space.
The goal isn’t to overbuild. The goal is to avoid boxing in equipment in a way that creates safety issues, poor performance, or an inspection fail that forces you to rebuild a finished soffit.
Insulation And Vapour Barrier Inspection
This is a common pass-fail stage in finished basements because it’s easy to do fast and hard to fix later. Insulation coverage, continuity, and vapour barrier detailing all matter because basements manage moisture differently than upper floors.
Small gaps and poor sealing are why this stage fails, and Yorkland’s guide on vapour barrier done right explains how trapped moisture develops and what proper installation prevents.
Fire Separation And Life-Safety Details
Fire separation details tend to show up when your layout increases risk. That can be a suite-like design, separation around stairs, or specific assemblies tied to your plan. The point is not “add more drywall.” The point is to build the correct system and keep it continuous.
Yorkland’s guide on basement fire separation covers where this detail fails in practice and what a compliant assembly needs to include.
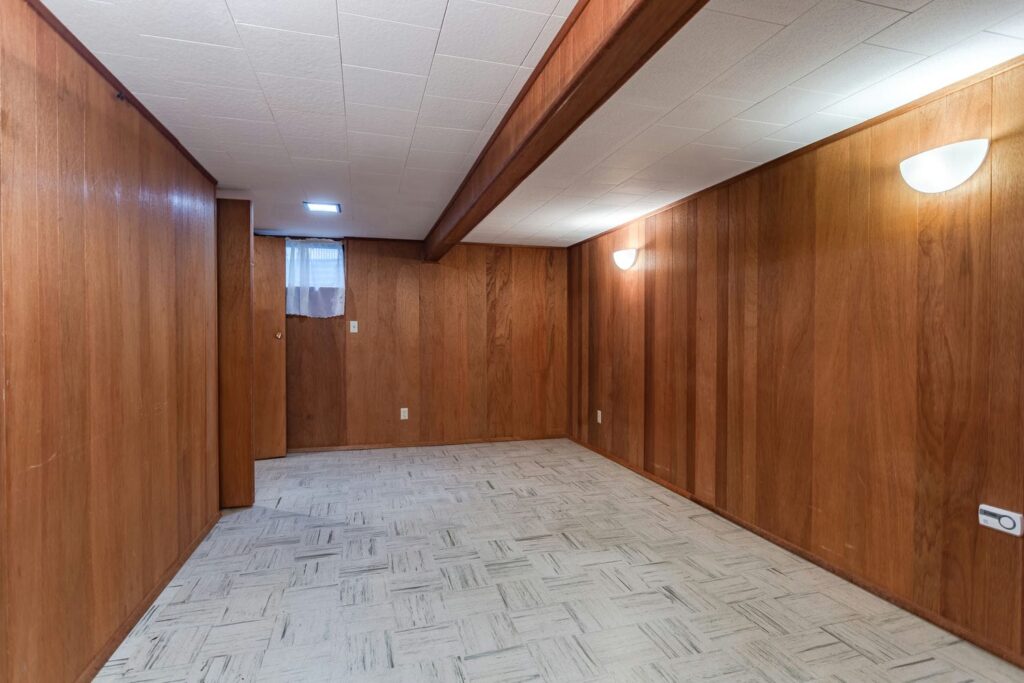
Final Inspection
Final inspection is the wrap-up. The space is complete, safety basics are in place, and the work matches the approved scope. Final is not the time to negotiate design changes or explain why you did something differently on site.
In practical terms, a clean final inspection is the result of clean mid-build inspections. If you pass early stages properly, final tends to be straightforward.
What Inspectors Commonly Flag In Finished Basement Projects

Most inspection issues come from avoidable habits. Rushing. Covering work early. Changing scope midstream. Or assuming the inspector “won’t care” about a detail that is hard to see.
If you want a basement that finishes on time, focus on what inspectors flag most often, then design your schedule to prevent it.
“Covered Too Soon” Work
This is the fastest way to lose time and money. Covered insulation, covered rough-ins, and covered structural details force guesswork, and inspectors don’t approve guesswork.
Toronto’s building inspections page is direct about the consequence: if you cover required elements before inspection, you may need to uncover them so they can be inspected and passed.
Safety And Exiting Assumptions
Basements get risky when you add bedrooms or create long travel paths without thinking through exits. Many homeowners assume “a window exists” equals a safe exit. That assumption can collapse under inspection, especially if the window can’t function as a practical escape route.
If your plan includes bedrooms, understand the basement egress requirements before framing locks you in, since exit details are much harder to fix after walls are built.
Mechanical Room And Access Issues
Mechanical areas often fail on access and practicality. Clearances get tight. Equipment gets boxed in. Service panels get blocked by finished walls or built-ins.
The fix is almost always painful because it happens late. A better approach is to treat mechanical access like a design requirement, not a leftover space.
Deviations From Approved Plans
If you change walls, add plumbing, move a bedroom, or alter exits without updating what’s been approved, you create friction at inspection time. Even if your change “seems minor,” it can shift what the inspector needs to see.
The homeowner-protection move is simple: keep scope, drawings, and build aligned. If you change something significant, don’t hide it. Document it and handle it properly before you cover the work.
How To Prepare For Inspection Day So You Don’t Waste A Visit
Inspection day should feel routine. If it feels stressful, the site probably isn’t ready, or the inspection wasn’t planned into the schedule.
Your goal is to make it easy for the inspector to see what they came to see. That means access, lighting, and exposed work that matches the stage you booked.
Pre-Inspection Checklist
Use this checklist the day before you call, and again the morning of the inspection. It prevents the most common “we weren’t ready” failures.
- Confirm the exact inspection type you’re booking and what must be exposed.
- Keep approved permit drawings and related permit documents on site.
- Clear a safe path to the work area and provide adequate lighting.
- Ensure ladders and access points are available if needed.
- Have the right person on site to answer questions and authorize access.
- Take photos of any details that will be covered right after the inspection.
Permit drawings and permit-issued records must be available on site upon request, which is a solid standard to follow across the GTA.
What “Ready For Inspection” Looks Like
“Ready” means complete for that stage, not almost complete. If your insulation is 90% done, you’re not ready. If your rough-in is missing key pieces, you’re not ready.
Toronto’s guidance on when to call for inspection reinforces the basic rule: you notify the inspector when the project is ready for each required stage, and the inspector must be able to see the entire building element being checked.
Booking, Timing, And Re-Inspections In The GTA

Inspection timing can make or break your schedule. If you don’t plan booking windows, trades sit idle. If you book too late, your build stalls. If you book too early, you fail and start over.
Treat inspection timing like a project constraint, not a guess.
Inspections Don’t Happen Automatically
Inspections do not “just show up” because you pulled a permit. The permit holder has to request inspections at the right stages.
The Richmond Hill Building Inspections page makes this clear: inspections do not happen automatically, the permit holder is responsible for contacting the Building Inspection Division when ready.
What You Need When You Call To Book
Every municipality is slightly different, but the booking basics are consistent. You should expect to provide the permit number, project address, inspection type, preferred date, and the contact person meeting the inspector on site.
Vaughan’s inspection scheduling page lists the exact booking requirements, which is a useful benchmark for what to have ready before calling any GTA municipality.
How Failed Inspections Usually Play Out
Most failed inspections end with a deficiency list or clear notes on what needs correction. You fix the items, then you rebook. The real cost is often the delay, not the repair.
The worst case is when you have to uncover finished work to show what’s behind it. That’s why we push a strict “don’t cover until sign-off” sequence.
Inspection Cheat Sheet Before You Close The Walls
If you only remember one thing from this article, remember this: inspections are cheapest when the work is visible. Once you close the walls, proof becomes expensive.
Use the cheat sheet below to map stage to readiness, and you’ll avoid the most common “we failed for something obvious” moments.
| Inspection Stage | What Gets Checked (High-Level) | What Must Be Exposed / Ready | Common Reasons It Fails | Your Best Prevention Move |
| Framing And Rough-Ins | Layout, framing readiness, visible rough-in work | Open walls and ceilings, clear access | Work incomplete, changes not reflected in plan | Lock layout early and keep rough-ins visible |
| Plumbing Rough-In | Visible plumbing work for new fixtures | Pipes, connections, access points visible | Covered work, missing tests or access | Don’t close bulkheads until plumbing is cleared |
| HVAC / Mechanical Changes | Duct routes, mechanical access, enclosure choices | Mechanical zones accessible and visible | Boxed-in access, tight clearances | Design mechanical access as a requirement |
| Insulation And Vapour Barrier | Coverage and continuity | Full coverage, clean detailing visible | Gaps, sloppy sealing, incomplete sections | Treat this as a pass-fail stage, not a rush job |
| Life-Safety Details (If Triggered) | Fire separation and exit-related items (scope-based) | Critical assemblies and details visible | Weak continuity, missing separation details | Plan life-safety details before finishes |
| Final Inspection | Completion and overall compliance with scope | Space complete, safe access, no missing items | Scope drift, unresolved deficiencies | Pass earlier stages cleanly so final stays simple |
The One Rule That Saves The Most Money
Don’t cover work until the right person has signed off.
That rule prevents the most expensive kind of rework: opening finished walls to prove what’s behind them. It also protects your schedule because you avoid the fail-fix-rebook cycle.
Work With a Basement Renovation Contractor That Understand Inspections
Inspections aren’t the enemy. They’re the guardrails that keep your basement safe, insurable, and easier to sell later. If you plan the scope, sequence the trades, and avoid covering work early, inspections become routine instead of stressful.
Yorkland Homes builds basements with a transparent pricing contract model and a detailed build schedule. We have been a family-owned business since 2010, with an on-time money-back guarantee and Limited Liability Insurance. Our finished basement services are built around passing inspections the first time, so your project closes on schedule.
Frequently Asked Questions
It depends on scope, but you should expect multiple milestone inspections, not one final walkthrough. Framing and rough-ins, insulation and vapour barrier, and final are common stages. Plumbing, HVAC, and life-safety checks can add inspections when your project triggers them. As a general rule, every stage that gets covered needs a checkpoint first.
You don’t always need to be there personally, but someone responsible should be on site. The inspector needs access, and questions come up. If nobody can answer basic questions or open locked areas, you can lose the visit. If you are hiring a contractor, confirm who meets the inspector and who owns any follow-up items.
Usually, that is a bad idea. Covering work early is one of the most common reasons projects fail inspections, and it can force you to remove drywall to prove what is behind it.
Most failures end with a list of deficiencies or notes. You fix the issues, then you rebook. The bigger cost is often the delay, especially if other trades are scheduled right after. If the failure involves work that is already covered, rework can become demolition, which is why sequencing matters so much.
Inspectors focus on safety, code compliance, and alignment with approved plans. They also focus on anything that will become hidden, like insulation and vapour barrier, rough-ins, and critical separation details.
Lead times vary by municipality and season. Some cities publish service standards and next-day scheduling rules, while others can stretch during high-volume periods. Plan a buffer so inspections do not stall your trades. Vaughan’s inspection scheduling page, for example, notes different timelines depending on when you book and whether it is a high-volume period.
They can, but only if the project is not staged properly. The delays usually come from calling too early, failing, and rebooking, or from covering work before sign-off. A build schedule that treats inspections as fixed milestones reduces idle days and keeps trades moving in the right order.
Check out more posts below...

In-Law Suite Vs. Legal Rental In Newmarket: Which Fits?

Why Older Newmarket Basements Often Need Underpinning

What Newmarket Requires To Register A Basement Suite

Basement HVAC Basics: Return Air, Zoning, And Year-Round Comfort