Mechanical Room Do’s And Don’ts In Finished Basements: Clearance, Access, And Noise

Finishing a basement mechanical room is not about hiding equipment. It’s about keeping the space safe, serviceable, and dry while the rest of the basement looks finished. If you want this planned as part of a full basement build, work with a basement finishing contractor that designs around access and clearances from day one.
A mechanical room that “looks nice” but can’t be serviced is a future demolition job. A mechanical room that’s quiet but starves equipment of air can become a safety issue. The goal is simple: clean finishes without compromising function.
Use this page as a practical check before you frame, drywall, or install doors.
- Do keep manufacturer clearances and a real work zone. Don’t build a tight closet around equipment.
- Do plan a replacement path. Don’t trap the furnace behind narrow turns and finished walls.
- Do manage condensate and leak risk. Don’t finish over water you can’t see.
- Do reduce noise with the right assemblies. Don’t block access to “make it quiet.”
What Counts As A Basement Mechanical Room And Why It Matters
A basement “mechanical room” is any area that houses equipment that heats, cools, ventilates, or manages water in your home. That might be a full room, a corner behind doors, or a tucked-away zone near the stairs. The label doesn’t matter. The function does.
When you finish a basement, you shrink tolerances. Drywall hides shutoffs. Flooring raises levels. Doors change access. If you don’t plan those changes early, you end up with a mechanical space that’s technically finished, but practically unusable.
A Mechanical Room Is A Service Zone, Not A Storage Closet
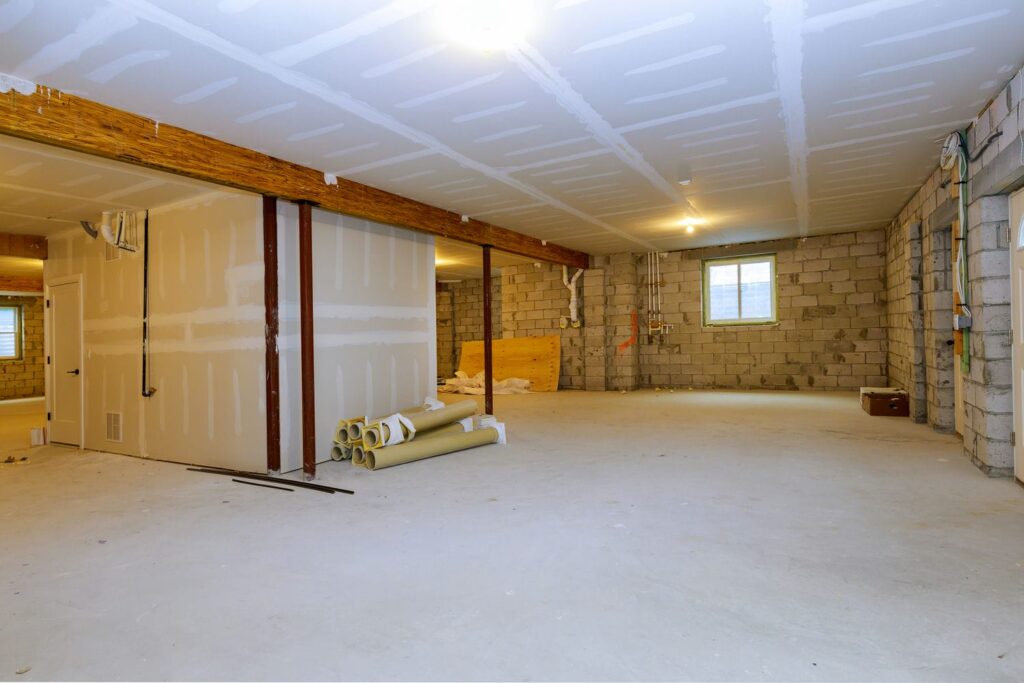
A mechanical room clearance is the space you must keep open so equipment can be inspected, serviced, and replaced safely. In most GTA basements, that includes some mix of a furnace or air handler, a boiler, a water heater, an HRV/ERV, sump equipment, and sometimes access to a backwater valve or cleanouts.
Finishing changes the “service reality.” The technician still needs to open panels, remove components, clean drains, swap filters, and test systems. If your finishes prevent that, the finishes become the problem.
A good mechanical room feels boring on purpose. Clear access, visible controls, and nothing in the way.
The Two Biggest Risks Homeowners Create By “Cleaning It Up”
The first risk is blocked access. You add shelves, tighten framing, or build doors that look clean, and suddenly routine maintenance requires removing trim or cutting drywall. That’s not a rare event. It’s the normal lifecycle of equipment.
The second risk is restricted airflow or trapped moisture. Combustion appliances, ventilation equipment, and condensate lines all depend on airflow and drainage. Tight enclosures and “storage creep” often create issues that only show up after a season of use. Start with function. Then make it look good.
The Non-Negotiables: Clearance, Access, And Serviceability

If you get this section right, the rest is easier. Clearance and access are the foundation. Noise control and aesthetics come after. When people reverse that order, they usually pay twice.
Your target is not “minimum.” Your target is “serviceable without damage.” That means room to work, room to remove panels, and room to replace the unit when its time comes.
Keep Clearances Based On The Equipment, Not A Guess
Clearances are not one-size-fits-all. They’re equipment-specific and tied to how the unit is serviced, vented, and maintained. The only reliable baseline is the manufacturer requirements for your actual furnace, boiler, or water heater.
What bad looks like is easy to spot: drywall tight to a service panel, shelving in front of shutoffs, or a door that can’t open fully because the equipment protrudes. It may look “finished,” but it’s functionally hostile.
What good looks like is also easy: a clear zone in front of service panels, controls you can reach, and nothing stored where a technician needs to stand.
Plan The Replacement Path Before You Frame A Single Wall
Every piece of mechanical equipment is temporary. Even if it runs well for years, it will get replaced. The replacement path is how you avoid turning that future replacement into a renovation.
Think through the route: stairs, turns, door widths, and tight pinch points. Mechanical rooms often get boxed in by new partitions and doors in a finished basement. If you frame too tight, you can create a situation where the only way to remove a unit is to remove a wall.
A simple mindset helps: if it came in once, it should be able to come out again without demolition.
Don’t Hide Shutoffs, Cleanouts, And Control Points
The things you need in an emergency are usually the things people hide during finishing. Water shutoffs, gas shutoffs, condensate cleanouts, drain cleanouts, sump access, and valves should stay visible and reachable.
Access panels are not a failure. They’re a planned feature. The goal is to place access where it’s discreet, but still easy to reach. A hidden shutoff behind shelving is not discreet. It’s dangerous.
If a leak happens, you want to solve it in minutes, not after you move boxes and cut drywall.
Combustion Air, Venting, And Safety: Why Tight Rooms Backfire
Some mechanical rooms contain combustion appliances. Some don’t. Either way, airflow and venting still matter because equipment needs space to operate safely and predictably. Tight enclosures are where “looks finished” can become “functions poorly.”
This is also where DIY-style enclosure decisions can create real risk. If you’re not sure, treat that uncertainty as a stop sign and get the right professional input before you build walls and doors.
Enclosing Equipment Can Create Airflow And Safety Problems
Combustion appliances need oxygen and safe venting. If you build a tight room or closet around equipment without a plan for air movement, you can increase the risk of backdrafting and combustion spillage. This isn’t a design detail. It’s a safety detail that should be treated seriously.
A practical question to ask is: “How does this room get air, and how do we keep venting safe after finishing?” If the answer is vague, the plan is not finished.
Natural Resources Canada explains combustion spillage and why it matters for homes that contain combustion appliances.
Mechanical Ventilation Equipment Still Needs Space To Work
Even if your equipment is high-efficiency or sealed-combustion, mechanical ventilation equipment still needs service space. HRV/ERV units need filter changes, core cleaning, and periodic checks. Duct connections and drains need attention. You can’t maintain what you can’t reach.
A common mistake is to treat the HRV/ERV as “set it and forget it,” then bury it behind storage or fixed cabinetry. That doesn’t save space. It just shifts cost into the future.
If you want the room to stay clean, give it an intentional layout and keep service points accessible.
Tie Mechanical Planning Into Your Basement Air Quality Plan
Mechanical room decisions affect the whole basement because they influence ventilation, humidity, and airflow patterns once the space is finished. If the basement becomes living space, you want air quality to feel stable, not clammy or stale.
That’s why we look at the mechanical room as part of the basement system, not as an isolated closet. It’s where humidity control and ventilation strategy become real, not theoretical.
If you want a basement-wide approach to humidity and air quality that works with your finished layout, use this guide.
Water Management: Condensate, Floor Drain Strategy, And Leak-Proofing
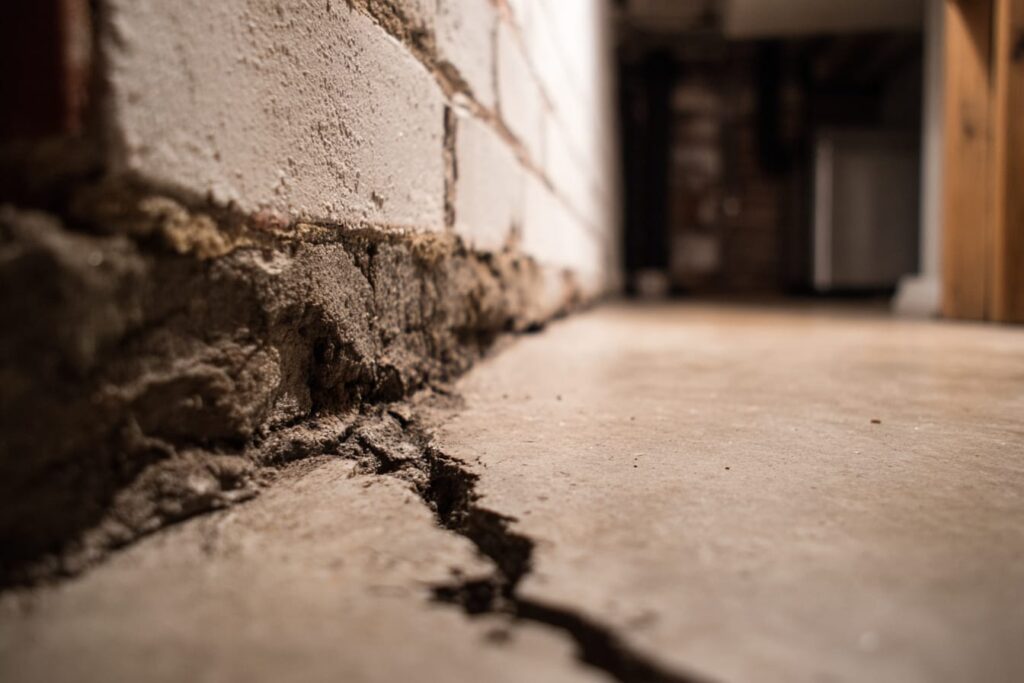
Basements and water go together. Sometimes it’s obvious, like a sump pit. Sometimes it’s subtle, like condensate from high-efficiency equipment. Either way, a finished basement makes leak risk more expensive because water can damage finishes fast.
A good mechanical room plan assumes water will show up somewhere and gives it a controlled path. A bad plan hides lines, buries access, and trusts that nothing will ever fail. Plan for “when,” not “if.”
Condensate Is Normal. Managing It Poorly Is Not.
Condensate is a normal byproduct of high-efficiency furnaces, AC coils, and some dehumidification setups. The problem isn’t condensate. The problem is poor routing and hidden failure points.
Bad setups look like hoses into buckets, loosely run tubing that can kink, or lines hidden behind finished walls where you can’t see a slow leak. Those choices turn a small maintenance issue into a finished basement repair.
Good setups keep routing tidy, secured, and accessible. You should be able to see connections, clean out traps, and confirm everything is draining the way it should.
Keep Sumps, Pumps, And Valves Serviceable
If your mechanical room includes a sump pit, pump, or related valves, access is non-negotiable. Storm events are not the time to discover you can’t reach the pump because storage crept in or the access panel is too small.
Serviceability also affects noise. Pumps vibrate. Water moves. If you trap that equipment inside a tight, hard box, you can amplify sound into the basement. Your goal is a clean, open service zone that stays clear over time. That’s a design decision as much as a habit.
Electrical Panels And Controls: Don’t Finish Yourself Into A Problem

Many basements place the electrical panel near mechanical equipment. That’s normal. What’s not normal is treating the panel wall like convenient storage because “it’s out of sight.” Panels need clear working space and easy access.
This is one of the easiest mechanical room mistakes to avoid because it requires no fancy materials. It only requires discipline and layout planning.
If you want a clean mechanical room, make the panel wall boring and open.
If The Electrical Panel Is In The Mechanical Room, Treat It As A No-Storage Zone
Don’t stack bins in front of it. Don’t build shelving that crowds it. Don’t hide it behind a door that becomes blocked by clutter.
A finished basement adds more “stuff” to your home. That’s exactly why the mechanical room needs boundaries. If you don’t set those boundaries, storage will eventually win and access will eventually lose.
The best-looking mechanical rooms are the ones where nothing has a reason to pile up.
Lighting And Convenience Outlets Make Maintenance Easier
Mechanical rooms should be bright. A dark room hides leaks, makes filter changes annoying, and encourages sloppy maintenance. Good lighting is not a luxury here. It’s basic functionality.
Convenience outlets also matter. Technicians may need power tools. Homeowners may need to plug in a shop vac or a temporary dehumidifier. If outlets are missing or awkward, people run extension cords through doorways, which becomes another trip hazard. Simple upgrades like lighting, labelling, and tidy cord management make the space easier to live with.
Noise And Vibration: Make It Quiet Without Blocking Access
Noise control in a mechanical room is about controlling paths, not stuffing random insulation wherever it fits. Airborne noise and vibration travel differently, and basements are sensitive because walls and ceilings connect to living areas.
The trap is trying to make the room quiet by sealing it up like a vault. That can create airflow problems, service problems, and moisture problems. The right approach is targeted: better door assemblies, better sealing, and better planning of penetrations. Quiet is achievable without turning the room into a problem.
Identify The Real Noise Sources First
Start by identifying what kind of noise you’re hearing. Blower noise is different from duct rumble. Pump vibration is different from drain noise. If you don’t identify the source, you’ll waste money treating the wrong thing.
Most mechanical room noise issues come from three places: vibration from pumps or equipment, duct vibration transmitted into framing, and air leaks through doors and penetrations. The solution changes depending on which one is dominant.
Do a simple test: listen with the door open and closed, then listen in adjacent rooms. That will tell you whether you’re dealing with door leakage, wall transmission, or system vibration.
Sound Control That Works In A Mechanical Room
The most reliable mechanical room sound control is built into the room envelope. Insulated wall cavities, a solid-core door, perimeter seals, and cleanly sealed penetrations can reduce noise without sacrificing access.
Avoid the temptation to block equipment with storage or build “tight boxes” around noisy components. That doesn’t fix vibration paths and it usually makes service harder. If the room needs airflow, you need a plan that respects that as well.
Check out this guide for a deeper look at basement sound-control strategies that apply to ceilings, ducts, and shared walls.
Step-By-Step: Plan The Mechanical Room Before You Finish The Basement
Mechanical rooms go wrong when they’re treated as “the last little area.” They should be treated as early design because they affect framing, doors, sound control, and even basement layout. This sequence is the cleanest way to plan the room so it works on day one and still works ten years later.
1) Inventory All Equipment And What Needs Routine Service
Start with a complete list of what’s in the mechanical space: furnace, boiler, water heater, HRV/ERV, sump, valves, drains, electrical panel, and any special controls. Then list what needs routine service, like filters, access panels, drains, and shutoffs.
This step prevents the classic mistake of building a clean-looking closet around the furnace while forgetting that the HRV filter needs service every few months. Mechanical rooms aren’t static. They’re maintained spaces. Once you know what needs service, you can design the room around those access points instead of fighting them later.
2) Mark Clearances And Working Zones On The Floor
Before framing, tape out the working zones on the slab. Mark door swings. Mark where a technician stands to service panels. Mark where you need to pull a water heater out in the future. This is a cheap step that prevents expensive framing mistakes.
If the tape layout feels tight, it will feel tighter once drywall, trim, and doors go in. Adjust now, not after. A few inches of planning can save you from a wall that has to be rebuilt.
This is also where you decide what storage is allowed, if any. Most mechanical rooms should stay minimal.
3) Confirm Airflow And Venting Strategy Before Building Walls
If the room contains combustion appliances or equipment that relies on air movement, confirm how the room gets air and how it vents safely after finishing. Don’t assume the current “open basement” condition will remain once you add doors and partitions.
A finished basement changes airflow. Doors get closed. Storage gets added. Air pathways change. If your plan depends on “it will probably be fine,” you don’t have a plan. Treat airflow and venting as part of the design, not a detail to patch later.
4) Plan Condensate And Drainage Like You Plan Plumbing
Condensate lines should be routed intentionally, secured, and visible where possible. Plan cleanouts and service points so small issues don’t become hidden leaks. If a line plugs, you want to know quickly.
Also consider floor strategy. Not every basement has a floor drain, but every basement has gravity, and gravity will find your finishes if water appears. Your plan should include how leaks are detected and how the space is protected. This is where a tidy mechanical room saves you money. Tidy usually means observable and accessible.
5) Add Noise Control Details Without Sacrificing Serviceability
Treat noise control as a room-envelope problem. Solid-core doors, seals, insulated wall cavities, and controlled penetrations do more than random foam panels. If vibration is the issue, address the vibration source and its connection points.
Don’t make the room “quiet” by burying equipment behind cabinets or building tight enclosures around it. That’s a future service fight. Your goal is quiet and accessible, not quiet at any cost. If the basement is a living space, noise control should be planned before drywall so the assemblies can do their job.
6) Slot Mechanical Work Into The Basement Renovation Sequence
Mechanical planning affects the schedule because it touches framing, rough-ins, inspections, and drywall timing. If you finalize the mechanical room late, it often forces rework in ceilings and walls, especially if equipment access or duct routes change.
Permits And Inspections
Mechanical room decisions sometimes stay purely “layout and finishing.” Other times they touch HVAC changes, venting changes, or equipment relocation, which can trigger permits or additional review depending on scope and municipality.
The smart move is to confirm the permit path before you build around assumptions. It protects your timeline and reduces the odds of having to open finished work later.
When Mechanical Changes Can Trigger Permits Or Additional Review
If you relocate equipment, modify venting, add or change HVAC distribution, or make other material mechanical changes during a basement renovation, you may need permits or inspections. The trigger is usually not the drywall. It’s the scope behind the drywall.
Instead of guessing, confirm early and build the requirements into your plan. If you want a focused overview of permits in basement renovations, this guide is the right starting point.
What To Never Do Before Closing Walls
Never close framing around equipment until access is confirmed and the service path is real. Never bury shutoffs, cleanouts, or key controls behind fixed finishes. Never finish a mechanical room in a way that forces demolition for basic maintenance.
Also avoid “temporary” storage decisions that become permanent. The mechanical room is where homeowners stash paint, chemicals, and boxes, then forget they’re blocking access. If you want the room to stay functional, design it so clutter is less likely to win.
Plan Your Basement Right From The Start
A mechanical room should disappear visually, not disappear functionally. When you plan clearance, access, drainage, and noise before drywall, you get a finished basement that stays easy to maintain and easy to live with.
We design first, then build, so you’re not solving mechanical problems after the finishes are in. You’ll get a transparent pricing contract model and a detailed build schedule you can track, backed by a family owned team since 2010. Ask us about our on-time money back guarantee when you’re comparing timelines and accountability. If you want your basement mechanical room planned properly as part of a full basement build, start by working with an experienced basement renovation contractor.
FAQs
You can enclose mechanical equipment in many cases, but only if the enclosure respects clearances, service access, and airflow requirements. The enclosure should allow panels to open, filters to be changed, and the unit to be replaced without demolition.
Clearance requirements depend on the equipment and manufacturer instructions. There isn’t one universal number that applies to every furnace, boiler, or water heater. The safest approach is to design around the actual unit specifications and leave a real working zone in front of service panels.
A mechanical room can sometimes hold limited, safe items, but it should never become a general storage closet. Avoid storing paint, solvents, chemicals, cardboard boxes, or anything that crowds equipment or blocks access to panels and shutoffs.
It depends on airflow needs and your noise goals. Louvers can support airflow, but they can also transmit noise. Solid-core doors reduce noise, but airflow still needs to be addressed if the equipment requires it. The right solution is not “always louvered” or “always solid.” It’s choosing a door strategy that fits the equipment and then building the room around that plan.
Not every basement has a floor drain, and not every project can add one easily. What matters is that you plan for condensate management and leak risk in a realistic way. That includes accessible drains, visible lines, and a layout that doesn’t hide water pathways. If you can’t add a drain, the next-best move is making the system observable and serviceable so small issues don’t become big damage.
Relocating equipment is possible, but it’s not a cosmetic decision. It affects venting, gas lines, electrical, condensate routing, and sometimes ductwork. It also affects replacement path planning and clearances in the new location. If relocation improves your basement layout, plan it early and confirm the scope so the finishing plan doesn’t get torn apart later.
Focus on assemblies and sealing, not on blocking equipment. Insulated wall cavities, a solid-core door, and sealed penetrations reduce noise while keeping the room serviceable. If vibration is the issue, address the vibration source and its mounting rather than enclosing it tightly.
Check out more posts below...
Why Older Newmarket Basements Often Need Underpinning

What Newmarket Requires To Register A Basement Suite

Basement HVAC Basics: Return Air, Zoning, And Year-Round Comfort
Behind The Walls Of A Newmarket Basement Renovation

Asbestos And Lead In Older Basements: What To Check Before You Renovate