Thermal Bridging In Basement Walls: Stop Cold Spots Before You Finish

If your basement has cold stripes, chilly corners, or a wall that never feels comfortable, you’re usually dealing with thermal bridging. The fix is not “more heat.” It’s building the wall assembly so heat can’t shortcut through concrete, studs, steel, and gaps. If you want help planning a warm, dry basement from the start, work with a basement finishing contractor that designs the envelope before framing and drywall.
Many basements get insulated, but they don’t get a thermal break, so you still feel cold lines where the structure conducts heat. That can also lower surface temperatures enough to invite condensation if indoor humidity stays high. This guide shows you where bridging happens, what to fix first, and how to sequence the work so you don’t pay twice.
What Thermal Bridging Is And Why Basements Get It Worse
Thermal bridging sounds technical, but the symptom is simple. Parts of your wall are “cold pathways” that bypass insulation, so the basement feels uneven even when the air temperature seems fine.
Basements amplify this because concrete is in constant contact with cold soil, and the perimeter is usually the coldest part of the house. Small misses in continuity show up as cold spots fast.
A Thermal Bridge Is A Shortcut For Heat Loss
A thermal bridge is any material or detail that lets heat move through the building envelope more easily than the surrounding insulation. In basements, the usual culprits are concrete walls, wood studs, steel beams, and uninsulated slab edges. Even if you insulate between studs, heat can still travel through the studs themselves and create “striping” on finished drywall.
Thermal bridging is also why “thicker batts” don’t always fix comfort. The insulation in the cavity may be fine, but the structure around it still conducts heat. Natural Resources Canada explains how a house loses heat through the building envelope and why continuity matters.
Why Thermal Bridging Creates Cold Spots And Condensation Risk
Cold spots are a surface temperature problem. When a stud line or concrete edge stays colder than the rest of the wall, the room feels drafty even when no air is moving. Your body reads that cold surface as discomfort.
It can also become a moisture problem. When indoor humidity meets a cold surface, condensation can form at the coldest points first. That often shows up at baseboards, corners, behind furniture, or as faint staining that follows framing lines.
You don’t need to panic about mould the moment you see a cold line. You do need to treat cold surfaces as a design issue, not just a heating issue.
Thermal Bridging Vs Air Leaks: How To Tell The Difference
Thermal bridging usually looks consistent and patterned. You’ll feel cold lines that mirror stud spacing, rim joist geometry, or concrete edges. The cold is “there all winter,” even if it’s calm and windless outside.
Air leaks feel different. They’re often localized at penetrations, rim joists, old window frames, or where services pass through the envelope. You might feel actual movement or notice the spot gets worse on windy days.
Most basements have both. That’s why the right approach pairs air sealing with a continuous thermal break, instead of picking one and hoping it covers the other.
Where Thermal Bridging Happens In Basement Walls
Thermal bridges cluster in predictable locations. If you know where to look, you can fix the high-impact areas before drywall makes everything expensive.
The goal is not perfection. The goal is to stop the main “short circuits” that make a basement feel cold and uneven.
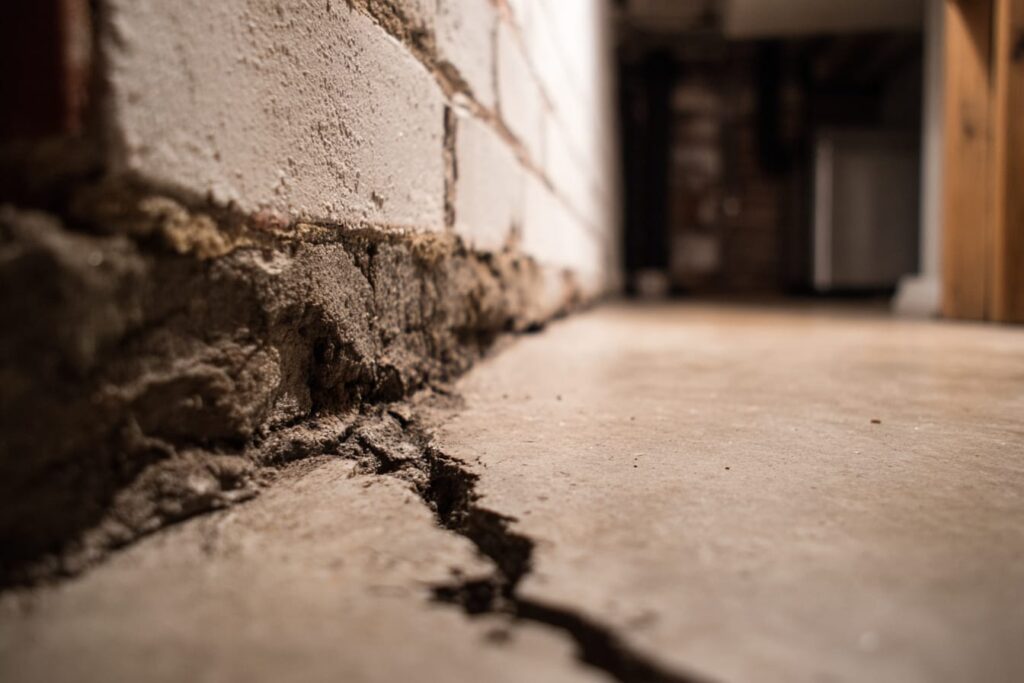
Concrete Foundation Walls And Slab Edges
Concrete is a strong conductor compared to insulation. If you frame a stud wall tight to concrete and only insulate the cavities, the studs and concrete can still pull heat out of the room. That’s when you get cold stripes and chilly perimeter walls.
Slab edges also matter more than people expect. Many homeowners fix the walls and still complain that the floor is cold at the baseboards. That’s often a slab edge continuity issue, not a furnace issue.
If you want warm floors and fewer cold perimeter complaints, look at a proper subfloor system that adds a thermal break and keeps finishes dry.
Rim Joists, Sill Plates, And Band Areas
Rim joists are a top offender because they combine complex geometry with lots of penetrations. You often have wires, pipes, ducting, and fasteners cutting through the area where you need continuity most. If the rim area is under-insulated or poorly air sealed, you get cold corners and that “chilly near the top of the wall” feeling.
This area also tends to show moisture issues first because the surfaces can get cold quickly. If you’ve ever seen condensation near rim areas, or smelled mustiness that comes and goes seasonally, treat the rim as a priority detail.
Solve the rim correctly early, and the whole basement feels more stable.
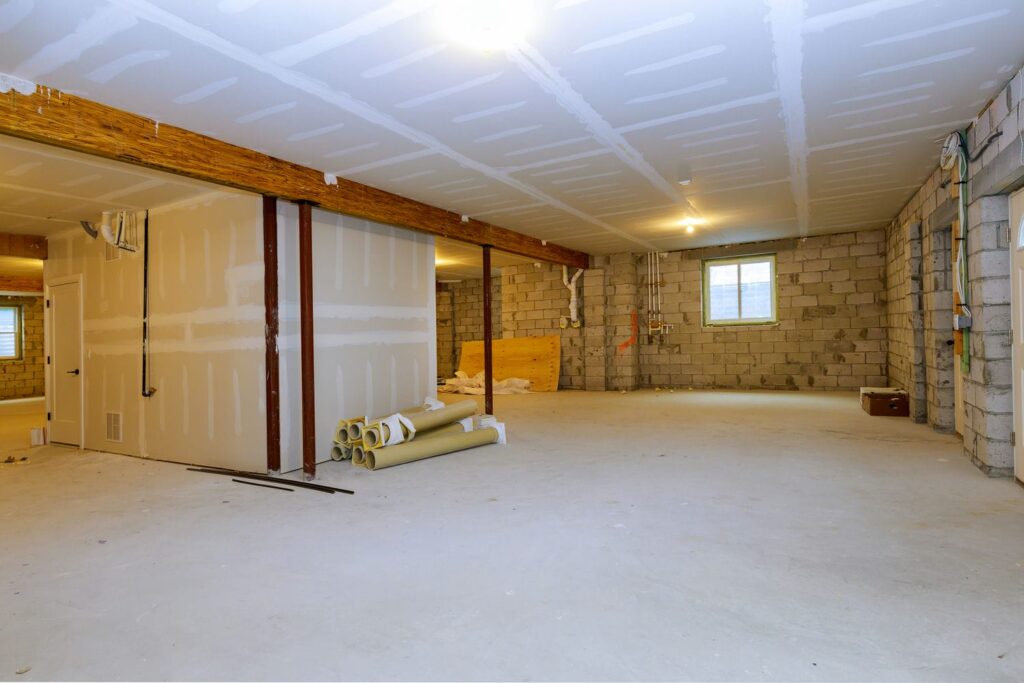
Steel Beams, Posts, And Beam Pockets
Steel is a major thermal bridge. If a steel beam sits in a pocket at an exterior wall or connects to cold masonry, it can carry cold into the interior. That cold can telegraph through drywall as a “random” cold patch that never quite goes away.
Beam pockets can be sneaky because they’re often hidden behind framing and finishes. Once you close the ceiling and walls, fixing the detail becomes disruptive. That’s why this is a planning issue, not a patching issue.
If your basement has steel posts or a beam pocket near an exterior wall, plan the insulation and air seal detail before you frame around it.
Window Wells, Headers, And Framing Interruptions
Basement windows create thermal bridging because framing density increases at openings. Headers, jack studs, and tight corners reduce the space for insulation, and it’s easy to miss continuity at the returns. That’s why you may feel a cold perimeter around a basement window even when the wall “should be insulated.”
The fix is usually straightforward: continuous insulation where possible, careful sealing, and clean transitions at the returns. This is one of those places where details matter more than thickness.
If you only focus on the big wall areas and ignore the window transitions, you’ll still feel cold spots right where you sit near the window.
Recap: Common Thermal Bridges And The Cleanest Fix
Use this table as a quick diagnosis tool before you commit to framing and drywall.
| Thermal Bridge Location | What You’ll Notice | Best Fix |
| Foundation Wall Behind Studs | Cold stripes on drywall | Add continuous insulation as a thermal break |
| Rim Joist Corners | Cold corners, occasional condensation | Tight rigid foam or spray foam plus air sealing |
| Slab Edge Perimeter | Cold floor at baseboards | Subfloor thermal break and wall-to-floor continuity |
| Beam Pocket Or Steel Post | Random cold patch or cold “line” | Isolate/wrap and air seal the detail |
| Around Basement Windows | Cold perimeter around the opening | Insulated returns and sealed transitions |
This is the practical truth: most cold-spot complaints trace back to a small number of repeat offenders. Fix the repeat offenders and the basement starts feeling “even.”
The High-Impact Fix: Add A Continuous Thermal Break Before Framing
If you only take one idea from this article, take this one. Continuous insulation is how you stop heat from bypassing your cavity insulation through studs, concrete, and structure.
Think of it as a jacket for your basement walls. The jacket needs to be continuous, sealed, and carried through transitions.
Why Continuous Insulation Beats More Batts
Batts work best when they fill an uninterrupted cavity and stay dry. In a basement, the cavities are interrupted by studs, headers, corners, and structural elements that conduct heat. So even “good batts” can leave you with cold striping because the studs become the cold pathway.
Continuous insulation works because it covers the structure. It reduces the temperature difference across framing members and warms the interior surface of the wall assembly. That’s what you feel as comfort.
This is also why two basements with the same furnace can feel completely different. The envelope details decide how stable the room feels.
Best Places To Add The Thermal Break In A Basement Wall
The most common place to add a thermal break is on the interior face of the concrete wall before framing goes up. That lets you keep the thermal layer continuous and protect the framed wall from cold surfaces.
In some designs, you’ll also use a service cavity so you don’t puncture the thermal layer with wiring and plumbing. That reduces penetrations and keeps the thermal break doing its job.
Your best location depends on constraints, but the rule stays the same: the thermal layer must be continuous where the cold wants to enter.
How To Keep The Thermal Break Continuous At Transitions
Transitions are where most basement insulation assemblies fail. The wall looks fine in the middle, but the rim joist area has gaps, the slab edge is exposed, and the window returns are under-detailed. That’s when cold spots persist even after “insulating.”
Focus on continuity at three places: the rim-to-wall connection, the wall-to-floor edge, and openings like windows. These are the bridges that sneak around your insulation.
If you treat transitions like leftovers, the basement will feel like leftovers.
Assembly Options That Work Below Grade Without Creating A Moisture Problem
Basement wall assemblies must do two jobs at once. They must slow heat loss and they must stay moisture-aware so you don’t trap condensation behind finishes.
The right assembly depends on your basement’s conditions, your layout, and how much space you can give up. The wrong assembly looks fine on day one and causes headaches later.
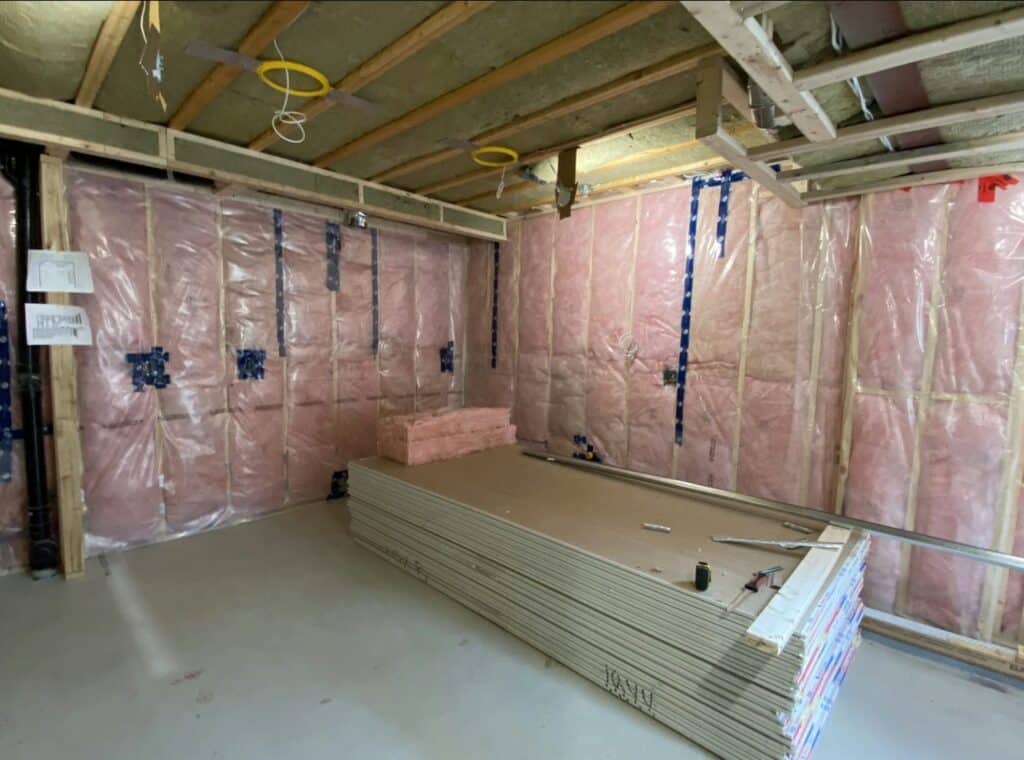
Rigid Foam Plus Framed Wall
Rigid foam plus a framed wall is a classic approach because it’s predictable. The foam provides the thermal break against the concrete, and the framed wall gives you space for wiring, finishes, and additional cavity insulation if needed.
This approach lives or dies on details. Seal seams, treat corners carefully, and avoid gaps at the rim and slab edge transitions. If the foam layer is discontinuous, you’ll still feel cold spots.
Done right, this assembly usually delivers the biggest “comfort jump” for the effort.
Closed-Cell Spray Foam
Closed-cell spray foam shines in complex areas like rim joists, tight corners, and transitions with lots of penetrations. It can provide insulation and air sealing in one step, which is useful in the parts of the basement where “taping every seam” becomes unrealistic.
It’s not magic, and it’s not required everywhere. Thickness, continuity, and proper application matter more than the label on the truck. Use it where it solves the hardest details.
In basements, the rim area is often where spray foam earns its keep.
Hybrid Walls: Foam For The Thermal Break, Batts For The Cavity
A hybrid approach often gives you a good balance. The foam layer handles thermal bridging and helps with surface temperatures, while batts in the cavity add R-value at a reasonable cost.
Here’s the catch: hybrids fail when the foam layer is too thin, too gappy, or poorly sealed. If the foam is not continuous, the studs and concrete still create cold pathways.
When the foam is continuous and the cavity insulation stays dry and well-fitted, hybrids can perform very well in basements.
The Full Basement Insulation Material Comparison
If you want a deeper breakdown of materials, R-values, and basement-specific mistakes, use our guide on insulating your basement the right way. It covers what works below grade and what to avoid when you’re finishing a basement.
This article stays focused on thermal bridging and cold spots. The insulation guide helps you pick the best material strategy for your specific basement.
Moisture And Air: Thermal Bridging Problems Often Look Like Humidity Problems

A lot of homeowners treat a cold, clammy basement as a “humidity problem.” Sometimes it is. Often it’s a surface temperature problem caused by thermal bridging and air leakage.
The right approach is layered. Fix the envelope details, then control humidity so the assembly can perform year-round.
Cold Surfaces Plus Indoor Humidity Equals Condensation Risk
When wall surfaces stay cold, they become the first place moisture shows up. You might see dampness behind furniture, darker baseboard edges, or condensation on cold days. It can also present as a musty smell that comes and goes seasonally.
This is why thermal bridging matters beyond comfort. It can set the stage for moisture issues even when your basement “isn’t leaking.” If the wall surface is cold enough, normal indoor humidity can become a problem.
The fix is not just a bigger dehumidifier. The fix is warmer surfaces and better air sealing.
Control Humidity So The Assembly Can Perform
Once you reduce thermal bridging, controlling humidity becomes easier. You get fewer cold surfaces and fewer condensation points, which means your basement stays more stable without constant intervention.
Humidity control can include ventilation strategy, dehumidification, and managing moisture sources like drying laundry and unvented bathrooms. The right plan depends on how you use the space and how the air moves through your home.
If you want a practical basement-wide humidity and air quality plan, start here.
If You Have Dampness Or Mould, Fix That Before Insulating
If you already have dampness or mould, do not treat insulation as a cover-up. Insulating over an active moisture issue can trap moisture and make the problem harder to diagnose later.
Start with water management and root-cause fixes first. That could mean dealing with seepage, drainage issues, or persistent dampness at the perimeter. Then build your insulation assembly on a stable base.
If you need a practical guide to diagnosing and improving a damp basement before finishing, use this resource.
Step-By-Step: A Clean Sequence To Prevent Thermal Bridging In A Finished Basement
Thermal bridging fixes fail most often because of sequencing. People frame first, then try to “stuff insulation in,” then wonder why the basement still feels cold. The order matters because the thermal break and air sealing need access.
Use the sequence below as a simple project plan. It keeps the work clean and reduces expensive rework.
1) Confirm Moisture Conditions And Fix Any Leaks First
Start by checking the basics: visible damp spots, efflorescence, musty odours, and any obvious cracking or seepage. If the basement has active water issues, fix those first. Insulation should never be the bandage for a leak.
Also check the “hidden wet” zones like corners behind stored items and around window wells. These are the areas that get finished over, then fail later. A few minutes of honest inspection can save you a lot of drywall repair.
If the basement is dry and stable, you’re ready to plan the assembly.
2) Choose A Wall Assembly That Includes A Continuous Thermal Break
Pick a wall assembly that includes continuous insulation as the thermal break. Decide whether you’ll use rigid foam, spray foam, or a hybrid approach based on your constraints and goals.
Then plan your transitions. How will the wall meet the rim? How will you handle slab edges? What happens at windows and corners? These details decide whether your fix actually stops cold spots.
Lock the plan before framing starts so the thermal break stays continuous.
3) Install The Thermal Break And Air Seal All Seams And Penetrations
Install the continuous thermal layer first, then air seal it properly. Seams, corners, and penetrations matter as much as thickness. A small gap can act like a bypass route for cold air and cold surfaces.
This is where “good enough” becomes the difference between a warm basement and a basement that still has cold stripes. Take photos and confirm continuity before you cover anything up.
Your goal is simple: no exposed concrete lines at key transitions, and no obvious gaps in the thermal layer.
4) Frame Without Crushing The Thermal Break
Frame in a way that respects the thermal layer. Avoid shortcuts that compress insulation or create new bridges. Plan wiring and plumbing routes so you don’t puncture the thermal break unnecessarily.
This is also where coordination pays off. If you know where HVAC, plumbing, and electrical will run, you can reduce random holes and chases that break continuity.
A clean frame plan helps the thermal layer keep doing its job.
5) Plan Inspection Holds Before Drywall If Permits Apply
If your project involves permits, insulation and vapour barrier stages often have inspection timing that affects your schedule. You don’t want to close walls and then hear, “We needed to see that.” Build the inspection hold into the plan early.
Toronto provides a public example of when to call for inspection on small buildings, which is helpful as a reference point even if you’re elsewhere in the GTA.
The practical takeaway is to treat insulation and envelope work as a milestone, not a filler task right before drywall.
6) Finish And Verify: Spot-Check For Cold Stripes Before You Close Everything In
Before you commit to final finishes, do a quick verification. An inexpensive IR thermometer or thermal camera scan can show cold lines and gaps while you still have access. You don’t need lab-grade testing. You need practical confirmation.
Cold spots show up most in winter, so the best time to verify is when the temperature difference is high. If you catch a gap early, you fix it in minutes. If you catch it after drywall, you fix it in days. This is how you avoid “we should’ve” conversations later.
Common Mistakes That Create Cold Spots And What To Do Instead
Most basement cold spot issues come from common mistakes, not rare edge cases. If you avoid these, your basement will feel more even, warmer, and easier to keep dry.
Use these as a final checklist before you close walls.
Stud Wall Tight To Concrete With Batts Only
This approach often creates cold stripes because the studs still bridge heat, and the concrete stays cold behind the wall. The basement may look finished, but it won’t feel finished.
The better approach is to add a continuous thermal break against the concrete first, then frame and insulate intelligently. That warms the interior surface and reduces the cold pathways that cause striping.
If you want comfort, don’t rely on cavity insulation alone.
Gaps, Unsealed Seams, And Broken Continuity At Corners
Gaps in the thermal layer create bypass routes. You can install great insulation in the middle of the wall and still feel cold spots if corners, seams, and penetrations are left unfinished. This is where many “pretty good” basements fail.
Treat corners, window returns, and transitions like first-class details. Seal seams, finish edges, and confirm continuity before drywall. Small misses become big comfort complaints later.
A continuous thermal break only works if it stays continuous.
Ignoring Rim Joists And Slab Edges
Homeowners often focus on wall cavities and ignore rim joists and slab edges. Then they wonder why corners feel cold and the floor stays chilly at the perimeter. These are high-impact zones and they need a plan. A proper subfloor system can reduce cold floors and help keep finishes dry, especially at the perimeter. Solve the rim and the slab edge, and the basement comfort improves fast.
Treating Condensation As A Dehumidifier Issue Only
Dehumidifiers help manage indoor moisture, but they don’t fix cold surfaces. If the wall assembly stays cold due to thermal bridging and air leakage, you’ll keep fighting symptoms.
The smarter approach is to fix the envelope first, then dial in humidity control. That gives you warmer surfaces and fewer condensation points. Control the cause, then control the conditions.
Work With Yorkland Homes To Stop Cold Spots Before Drywall
A warm basement is not luck. It comes from a wall assembly that blocks thermal bridging, seals air leaks, and stays moisture-aware through every transition. When you handle those details before framing and drywall, the basement feels even, comfortable, and easier to keep dry.
Yorkland Homes plans the envelope early, then builds to a clear scope with a transparent pricing contract model and a detailed schedule you can follow. We’ve been family owned since 2010, and we carry Limited Liability Insurance. If you want help getting the insulation and air-sealing details right as part of a full basement build, start with our basement renovation services in the GTA.
Frequently Asked Questions
Thermal bridging in a basement happens when heat bypasses insulation through materials that conduct heat well, like concrete, wood framing, and steel. Instead of the wall acting like one uniform insulated layer, certain lines and edges become “shortcuts” for heat loss. That’s why you can feel cold stripes even when the wall is insulated. The fix is usually a continuous thermal break plus air sealing, not just adding more insulation in cavities.
Thermal bridging usually shows up as consistent cold lines that mirror studs, beams, or concrete edges. Air leaks show up as localized cold areas near penetrations, rim joists, or openings, and they often feel worse on windy days. Most basements have both issues. Solve air sealing and thermal bridging together for the best comfort improvement.
Yes. Wood studs conduct heat more than insulation, so heat can travel through the framing and create cold stripes on finished walls. Cavity insulation alone doesn’t stop that pathway. That’s why continuous insulation is such a high-impact fix. It covers the studs and reduces the temperature drop across those framing lines.
In most cases, the best approach is to install a continuous thermal break on the interior face of the foundation wall, seal seams and transitions, then frame and finish the wall assembly. This reduces cold surfaces and helps prevent condensation risk at cold spots.
Your transitions matter as much as your materials. Rim-to-wall, wall-to-floor, and window returns decide whether the fix actually works.
Thermal bridging can lower surface temperatures enough that indoor humidity condenses on the coldest areas. That can show up as damp baseboards, staining, or musty odours over time. It doesn’t guarantee mould, but it can create the conditions for it. If you already have dampness or mould, fix the moisture source first, then build a moisture-aware wall assembly.
Often, yes. Rim joists have complex shapes and lots of penetrations, so they benefit from insulation approaches that also air seal well. Many homeowners use spray foam or carefully fitted rigid foam with sealed edges in that zone. What matters most is continuity. The rim detail needs to connect cleanly to the wall thermal break so there’s no gap in the envelope.
Not always, but cold floors are often part of the same perimeter problem. If the slab edge stays exposed or poorly detailed, the floor can feel cold at the baseboards even when the walls improve. A good subfloor system can add comfort and help manage moisture at the floor level.
The biggest mistake is treating insulation as “stuffing the cavities” instead of building a continuous thermal break with sealed transitions. That approach often leaves cold pathways through studs, concrete edges, rim areas, and openings. The second biggest mistake is insulating over moisture issues. Dry first. Then insulate.
Check out more posts below...
Why Older Newmarket Basements Often Need Underpinning

What Newmarket Requires To Register A Basement Suite

Basement HVAC Basics: Return Air, Zoning, And Year-Round Comfort
Behind The Walls Of A Newmarket Basement Renovation
Asbestos And Lead In Older Basements: What To Check Before You Renovate